"Blessed are the children of scrapbookers, for they shall inherit the scrapbooks." ~Author Unknown

email us at lilbugger.ca@gmail.com


Friday, September 7, 2012

Happy Birthday Dad!

Today's my dad's birthday!!  I thought I'd share the card I made him.

I have to give a shout-out to Lori at livingorganized chaos.blogspot.com for posting her project for the PERFECT "guy" card.  This card was perfect for what I was looking for to make for my dad for his birthday.  I used the toolbelt Design Studio file, which can be found here.  Thanks Ruelysi!!


My dad LOVES to tinker with tools and build and renovate things.  He's definitely a "Jack of All Trades".  He was missing for so much of my life and I feel so blessed to have him in my life now.  I wanted to let him know by putting my heart into a special birthday card for him.

In addition to the cut file, I used the Learning Curve cartridge for the letters on the tape measure.  I used the Doodletype cartridge for the "Happy Birthday" on the middle section.  The Handyman Lite cartridge was used for the level in the pocket.  I believe it was cut at 4.5", and I cut all relevant layers.  The pockets of the tool belt had some faux-stitching that I added with my gel pen.

The entire cut was made at 11.5" wide and I scored it to fold in three sections, 3.5", 4", and 3.5".

The cute little screw-head brads are from Making Memories and I got them in the clearance bin of Michael's, if you can believe it!

Most of the paper is Bazzill Basics.  However, I ran out of plain silver, so I used aluminum tape (found reasonably priced at most hardware stores) and stuck it down on paper to cover it and then ran it through my Cricut.  I think it gave a great "metal" look.

Happy Birthday, Dad!! xoxox

What are YOU crafting today??

Happy Buggin'!

Thursday, September 6, 2012

New Take on a Thank You Card

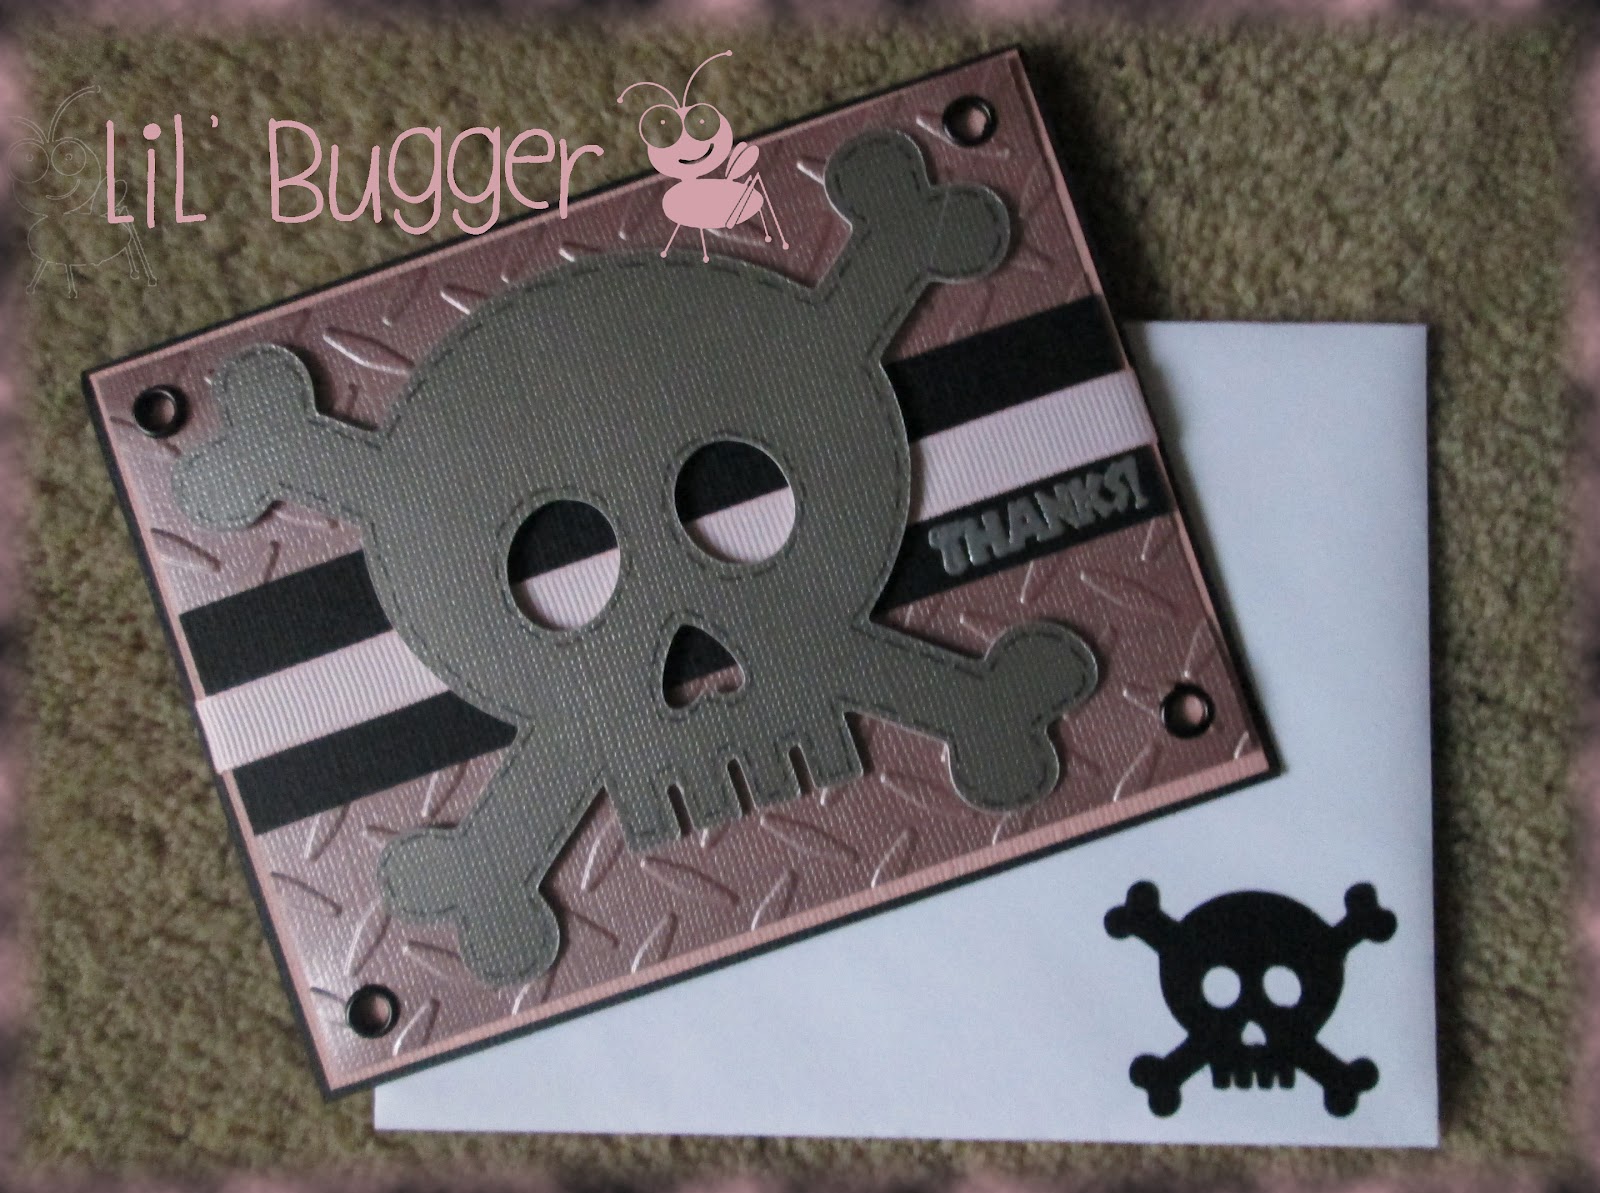
How's this for cute??  A little out of my norm for thank you cards, but it worked well for the recipient, she loved it.

The skull and crossbones is from the Life's A Beach cartridge.  I cut it at 3.75" out of Gunmetal paper from the Metal Stacks collection.  The base is Rose, from the same metallic paper collection and I embossed it with my Cuttlebug using the Diamond Plate embossing folder.  I embellished the card using plain black eyelets in the corners of the base and a black gel pen around the edges of the skull and crossbones.  I then used pop-dots to give it some dimension from the card itself.

Now, this is what I thought was cool...I embossed the word "THANKS" onto black ribbon with silver embossing powder and my heat gun, then topped the wide black ribbon with a narrower pink grossgrain ribbon.  I didn't know how well the embossing ink would work on the ribbon, or how it would survive the heat gun, but I was extremely happy with the result.

I also cut another skull and crossbones to adorn the envy.  I believe it was cut at 1.25".

The inside sentiment says "YOU ROCK" "THANK YOU SO VERY MUCH".  I printed it in Word using the Bones font.

I was actually inspired by a similar card on another blog, but I can't for the life of me find it again.  If you happen to know where it came from, please let me know as I'd love to give credit.  In the meantime, I'll keep looking.

What are YOU crafting today??
Happy Buggin'!

Friday, June 22, 2012

Hello Thursday June 2012

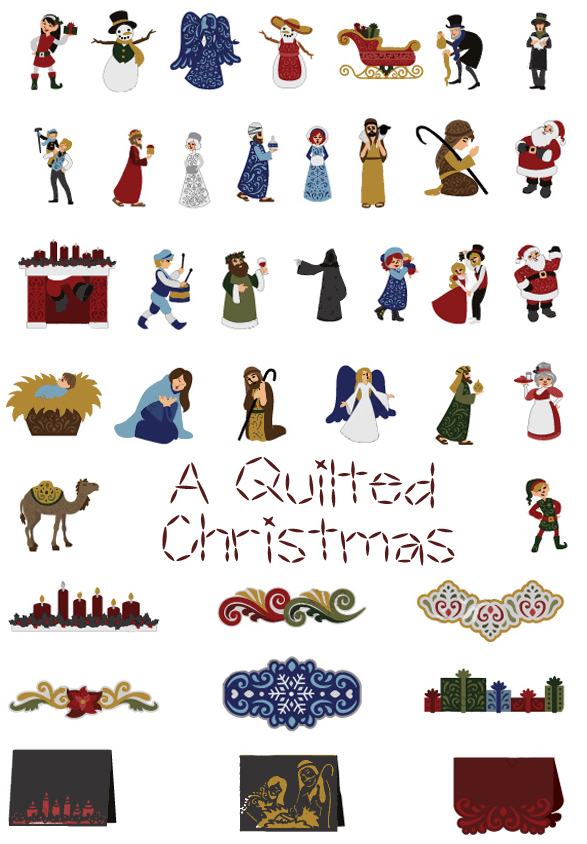
Hello Thursday for June!! Two full-featured cartridges released this month: A Quilted Christmas and Dr. Checkup.


A Quilted Christmas, a full-featured Cricut Everyday cartridge. Released June 2012. Celebrate the spirit of the season with the festive and colorful images on A Quilted Christmas cartridge! These timeless holiday images will make beautiful Christmas cards, cute holiday décor, and memorable scrapbook layouts. Try using the silhouettes for glass etching projects, gift tags, or wrapping embellishments. Use the latest Cricut® cartridges to create unique and engaging designs for every occasion. The versatility of the cartridges will surprise even the most imaginative crafters.


Dr. Checkup, a full-featured Cricut Everyday cartridge. Released June 2012. Cheer up your sick child with the Dr. Checkup cartridge! This whimsical cartridge is perfect for turning the sometimes scary experiences of childhood illnesses and injuries into something upbeat and hopeful. You will love making thinking of you cards, gift tags, and get well soon gifts and goodies with these images. Use the latest Cricut® cartridges to create unique and engaging designs for every occasion. The versatility of the cartridges will surprise even the most imaginative crafters. Features health related images and phrases that are perfect for thinking of you cards, gift tags, and get well soon gifts and cards.

I'm really excited to use Dr. Checkup! As a parent, it's great to document all the bumps and bruises of my boys' childhood.  And to make it even better, I have a budding paramedic in the house, so this cartridge is right up my alley!

Enjoy!

What are YOU crafting today??
Happy Buggin'!!

Thursday, June 14, 2012

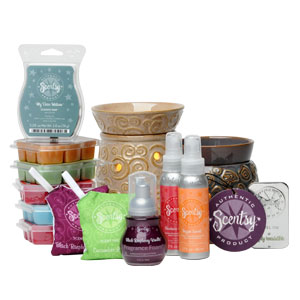
Scentsy, Where Have You Been All My Life??

Well, I did it.  I caved. And my house, car, scraproom, bathroom, kitchen, and even my sister's house smells better because of it!

Not a day goes by that I don't get an invite to some sort of party...whether it be Tupperware, Avon, Epicure, or chocolate or lingerie.  It seems that everybody is selling or pushing something these days.  As much as I love most of these products, I find I need to really watch where the money goes.  It's bad enough my scrap-habit has consumed me, I don't need another addiction!

And yet, that's exactly what's happened! I found Scentsy.  And I love it!  The warmers are gorgeous and the scents are to die for. If you've never heard of Scentsy, or experienced it first-hand, shame on you, lol!

I just wanted to shout out to my awesome (and totally enabling) friend and Independent Scentsy Consultant Irene. (Who I lovingly refer to as my dealer, lol).  You can email her here or check out her website (you've been warned!):

You can also click on the logo or find her in my side bar.  Tell her I sent you and she'll treat you good!

Thanks Irene!!


Wednesday, May 16, 2012

Are You A Baker's Twine Lover??

If you love Baker's Twine half as much as I do, you will loooooooove this.  I can't believe how incredibly easy this is!!  I love that I can make my own twine and I can match it exactly to what I need!! I just had to share! :)

I found the original post on the Frugal Crafter's blog, and the video was posted by UKmaryanne on YouTube. Enjoy!

Happy Buggin'!!
What are YOU crafting today??


Saturday, March 24, 2012

Ginger Snap Scraps GRAND OPENING!!

Join me in celebrating the GRAND OPENING of my friend Cori's online store!!

Ginger Snap Scraps is a brand new online scrapbook store, run & owned by stay-at-home mom


She is having a Grand Opening Event on Friday, April 6. 
You can join the Facebook event by clicking here.

There will be free shipping on $25 orders for the grand opening weekend only!

Ginger Snap Scraps carries your favorite brands such as My Minds Eye, Provo Craft, Echo Park, Graphic 45, Zig, DCWV, Bo Bunny, La La Land, Peachy Keen, Riley & Co., Bella Blvd, Tim Holtz, Bazill, Basic Grey, Pink Paislee and many more!

ALL of the Cricut cartridges offered at Ginger Snap Scraps are $35 and under-all the time.

Please join the Facebook event to be eligible for giveaways and prizes on the day of the grand opening.


*Regular shipping at Ginger Snap Scraps is $5 flat rate shipping and $100 orders ship free.  You will earn 1 point towards every dollar you spend.  Once you reach 250 points you can redeem them for a $10 store credit.

Friday, March 23, 2012

Happy Birthday, Lil' Sister :)

Today is my sister's birthday!!

I made this for her:
I'm SO excited with how it turned out!! And it was unbelievably easy! (I like easy.)

The frame is a 12" x 12" frame from Michael's that is marketed as an "LP Frame".  Remember them?? Vinyl LP Records!  This frame cost $4.99...when just a few shelves over, the "Scrapbook Layout" frame of the same size was $16.99.  Gee, which one will I buy?  And add to that a 50% off coupon, and really, it's a steal!

So, the frame has glass, and I cut black vinyl and applied to the FRONT of the glass.  The Eiffel Tower is cut at 11" and is from the Summer in Paris Seasonal cartridge.  The words "Vie. Rire. Amour." (Live. Laugh. Love.) are cut from the Creative Memories Divine Wedding cartridge.  I love love love that font!  (If you're looking for a great CM Consultant, check out my friend, Denyse!)  I can't remember the size, I think it was 2" or 2.5".  The little flourish is from French Manor, cut at 2" and the smaller letters are from the Elegant Cakes cartridge and measure in at 1" tall.

I cut the pink background from standard cardstock and glued it to some grey cardstock and assembled it UNDER the glass.
For a little extra, I took a "Love" brad by Making Memories and attached it to some pink grossgrain ribbon that matched the paper and glued it to the top of the tower, on top of the glass.  There are a few pearl buttons here and there on the letters of the vinyl as some accents.
Happy Buggin'!
What are YOU crafting today??


Monday, February 20, 2012

February Cut Revealed!

Remember my sneak peek of a couple of weeks ago??
Well, today is the 20th, and I'm now allowed to post my entire Cricut cut that I did for a monthly exchange group I joined, CricutCut Monthly-Exchange:https://www.facebook.com/profile.php?id=100003301545528. We're asked to wait to post our cuts until all members have received them.
I'm so happy with how it turned out! I used the Sweethearts cartridge for the words, the Indie Art Solutions cartridge for the lips and the Paisley cartridge for the little heart. "Kiss Me was cut at 3", and the lips were at 1.75". I used my gypsy to weld the shadows of the images together and then glued on the base cuts.

I used Cardinal Stickles for the lips and the heart and added a few pearl half-beads to embellish. I hope you like!! :)

Great group, awesome gals...go check it out and join in the fun!! They are now accepting new members for March's cuts!! 

What are YOU crafting today??

Happy Buggin'!

Wednesday, January 25, 2012

Sneak Peek!!

SNEAK PEEK!! Just wanted to share a snippet of a cut that I made with my Cricut for a monthly exchange with a group I belong to, called CricutCut Monthly-Exchange
I can't reveal the entire cut just yet...it needs to be a surprise for the rest of my group waiting to get them (I'll give you a hint...it's love-related). But I wanted to share! So happy with how they turned out. I'll post the entire cut after my group has received theirs. I'll also share what I received in exchange. 


Great group, awesome gals...go check it out and Wanna join in the fun!! A great monthly exchange of Cricut Cuts?? You mail out cuts once a month, and you receive cuts once a month! How great is that?? Great friends, good times, and Cricut cuts to your door! Go visit their page, join the group, and be sure to tell them I sent you!! If you join the group because of me, I could win a set of great Peachy Keen stamps!

What are YOU crafting today??

Happy Buggin'!
Sunday, January 22, 2012

ScrapbookPal.com Design Team Entry!! :)

Sleighride Mickey Mouse

This is a custom birthday invitation I recently made for a 2-year old little boy who just adores Mickey Mouse. They are going winter sleigh-riding for his birthday, so I tried to keep it wintery and cute, but yet not too "Christmassy". The card is a standard A2 card, measuring 4.25” x 5.5”.
1. I cut my base cardstock from white Bazzill, measuring 8.5” x 5.5”. It was scored at 4.25” and folded in half, making the card base.

2. I cut an accent base from blue Bazzill, measuring 3.75” x 5.5”. Centred it over the front of the card and glued in place.

3. A second “base” was cut from the white cardstock, measuring 3.5” x 5.25”. I ran it through my Cuttlebug, using the Snow Flake embossing folder. Using some blue ink (I like the Tim Holtz distressed ink, and used Chipped Sapphire for this project), I inked the edges of the cardstock and a few of the snowflakes, then used the Champagne Stickles, to accent a few of the embossed snowflakes. (Let the ink and stickles dry before adhering).

4. Mickey Mouse (cut at 2”) and the sign post (cut at 3.75”) are cut from the Disney Mickey and Friends Cricut cartridge, the sleigh (cut at 2.25”) is from the Christmas Cheer cartridge, which was sadly retired in May of 2010. :(

5. Before assembling the layers of the sleigh, I embossed it with my Cuttlebug using the Swiss Dots embossing folder and pop-dotted it to add a little dimension and “stickled” the runners of the sleigh.

6. As an added touch, I cut the Mickey Ears and shadow at 1” to embellish the envelope a bit.

The wording of the inside of the invitation was printed on the computer with MS Word, using the Mickey Mouse and Minnie Mouse fonts.

It turned out sooooo cute, and was the perfect invitation for his party!
This post also happens to be my entry into the Design Team call for ScrapbookPal.com! Wish me luck!!


What are YOU crafting today??
Happy Buggin’!


Thursday, December 1, 2011

Creative Memories - 'Tis the Season Joy Jar

Simple, simple craft. I stuffed mine with crimped paper strips to take the photo, but imagine how adorable they'd look filled with yummy Christmas candies, mints, chocolates, or jellybeans?!? Fun and easy way to show your appreciation to teachers, neighbours, co-workers...the possibilities are endless.

I recycled an empty candle jar (after enjoying the candle...gift for me, gift for others). I used the "Joy" cut from the Creative Memories 'Tis the Season Cricut cartridge (pg. 41) and cut it from red vinyl. I applied it to the jar using my painter's tape technique (check out the tutorial here on my blog at http://lilbuggerblog.blogspot.com/2011/02/vinyl-application-with-painters-tape_07.html ) and tied a matching red grossgrain ribbon around the top. Easy peasy!!

Need a Creative Memories consultant?? Check out my gal, Denyse! Tell her I sent you...she'll look after you :) You can link to her from my left side bar or by clicking on the logo below.
What are YOU crafting today??
Happy buggin'!


Saturday, November 19, 2011

Diaper Cake & Matching Monogram Card

Well, after a (too) long hiatus from posting, I have returned, and made it my mission to *try* to catch you up on everything that's been going on!  Basically, in a nutshell, I went and got myself a full-time job, and it's really REALLY been cutting into my "me time" and my "crafting time", LOL!  Things are going well, I love my new job.  I just needed some time to get adjusted, get used to the schedule demands and to figure out how to fit all my crafting in.  I think (knock on wood, tap tap) I may have figured it out.  Wish me luck!!


Now, back to the nitty-gritty and the fun stuff!!

This is a diaper cake and matching monogram card that I made for my dear girlfriend who just had a beautiful baby boy!!  Welcome to the world, Mason :)

To make the cake, I made three tiers.  The diapers of the bottom tier are folded in half, the ones of the middle tier are folded into thirds, and the ones of the top are rolled.  Double-sided tape was my saviour to this project, as it was used to secure the wine bottle and bottom tier to the base (which I used a round cake board), and it was also used to secure each tier of diapers to the one below it.  
When making my tiers, I held all the diapers temporarily in place around the wine bottle with an elastic band until I could secure them with ribbon.  Then I just lifted off the elastic.  I added a few sample packs of diaper rash cream in the middle around the wine, and on the second tier of diapers, I snuck a snack size chocolate bar in between every other diaper.  All new moms need wine and chocolate, right?!?! :)

Now for the embellishments!!  The bunny on top is a super soft, fuzzy blanket.  I tucked it all together, secured with an elastic band and stuffed it into the centre of the top tier of diapers.
I used the Reminisce Accents cartridge from Creative Memories to make the "M".  For the cake, I cut the "M" at 3.5", and I cut the plain circle monogram at 4" to use as a back.  For the matching monogram card, I cut the monogram at 1.5" and the circle at 1.75".  I glued it to the ribbon on the middle tier, and as well on the card.  You can link to my awesome CM Consultant, Denyse, here and as well on my sidebar.  I am LOVING this cartridge for the monograms!

The three little dinosaurs on the bottom tier were cut from the Birthday Cakes cartridge.  I used the base, the shift, as well as the blackout shadow features, and I cut them at 2.5" on my Expression. I secured them to the ribbon with a little glue.

For the background of the card, I embossed my blue paper with my Cuttlebug and the "Our Baby" embossing folder.  The inside just says "Welcome, Little One", which I printed in Word, using the Angelina font.

What are YOU crafting today??
Happy buggin'!


Tuesday, May 24, 2011

Smiley Face Treats

We've undergone a huge transformation where I work.  People are moving and shuffling, departments are merging and moving, frustrations are high, and stress is everywhere.  Today we had a staff meeting of where things stood so far.  It was a great forum for expressing our concerns, and venting our frustrations with others.  I thought these little smiley face Smartie sleeves would be a perfect way to bring a bit of sunshine to our meeting.  


I used a smiley face that I googled and imported it into my SCAL software.  I added a little circle to the top and welded it to the smiley face to give me a place to hole-punch it for the ribbon to go through. The cardstock is Bazzill Basics and the ribbon is grossgrain from my local dollar store.

Who wouldn't smile seeing these?!?

What are YOU crafting today?

Happy Buggin'!


Thursday, April 28, 2011

Let's Go, Pittsburgh!!


This is a Pittsburgh Penguins card that we made for a friend's birthday. He is a huge Penguins fan!  I created the image from a .jpg of their logo that I found online.  I separated the layers in Photoshop:
Then I imported the image into Inkscape and converted it to an .svg file.  After the file is saved, I am then able to import into my SCAL and cut on my Lil' Bugger.  I did print a sentiment on the inside using Word, my printer, and the varsity font.  (Check here for my Coach cards, where I printed the inside of that card using the same font).

If you're interested in the .svg or the .scut file that I created and used for this project, feel free to email me.  I'm still having a hard time sharing those type of files online.

It was a huge hit!  He loved it :)

What are YOU crafting today?
Happy buggin'!